|
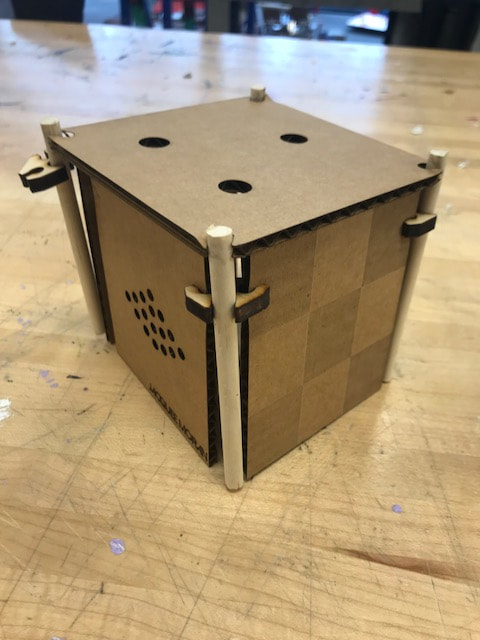
When beginning my synthesizer and enclosure project, I designed and printed my knobs first. I chose a diamond shape, and this process is explained in the 3D design section of my website. The 1M potentiometers has small diamonds and the 5k potentiometer has a larger diamond knob. Then I created the synthesizer with a breadboard and it took a lot of trouble shooting to make it work. I changed breadboards, the chip, the speaker and re-made the synthesizer multiple times, until it finally worked after many tries. Turns out there had been a short circuit and somewhere in the re-arranging it was fixed. The next step was to solder the synthesizer into a perfboard. Thankfully this process went well for me and the perfboard synthesizer worked the first time I soldered it! The visual design aspect was fun for me because I got to fiddle around with what to raster, score and cut. I love the idea of monotone, so I chose for my whole enclosure to be light blue, including my knobs. I created a checkered pattern to be rastered onto three of the tiles. My scoring aspect was my full name, with the same font as my sticker from the beginning of the year, and I placed it on the bottom corner of one tile. Finally my cut is holes placed into a diamond shape, for the sound of the speaker to pass through. I chose a blue, matte acrylic that happened to be shiny on the opposite side. This worked great with my idea to have checkers rastered onto the shiny side, so that those tiles would be both shiny and matte. And I decided to keep the other two tiles matte for some contrast. When it came to making my enclosure prototype, using the laser cutter went very smoothy. It turned out great except I forgot to place holes for the potentiometer and switch. I then went back into illustrator and placed the holes. I chose to put the potentiometers on the top tile in a triangle formation. In the prototype, the switch was fine, however my potentiometer holes were too small because I did not realize the screw part of it had to pass through too. Also, the holes were a little to close to the edges of the enclosure, not allowing enough space for the bottom of the potentiometers to be level with the tile. Once I figured out the right adjustment for the potentiometer holes, I placed the cardboard pieces together and completed my prototype. Finally, it was time to raster, score and cut the real acrylic. I was very meticulous about the tile sides because I didn't want there to be any mistakes. I had become a lot more comfortable with the laser cutter and the tiles turned out great! Next, with all my parts together I set up my final synthesizer! I am very pleased with the final product. Design Faults: I noticed after finishing my project that I had placed my name right where part of the tile slides into the wood. If I was able to retouch it, I would move my name to the bottom-center of the tile so that it wouldn't be blocked by the wood. In addition, weirdly, one of my faults worked out because I had soldered the switch to the synthesizer before fitting it through the hole. But because the hole was a little big I was able to push it through. The switch works perfectly and when you push it it won't go through, however it is a little loose. Looking forward to my 2D project I want to be more meticulous with my measurements. Also, when designing I want to think more about the overall look so certain elements don't get blocked (i.e. my name).
0 Comments
|
AuthorArchives
March 2018
Categories |


 RSS Feed
